
Safe River Crossing Techniques
This page may contain affiliate links.
Learn about wading, swimming, and other safe river crossing techniques. This post also includes ways to cross a river with rope or an improvised raft.
You will also learn how to cross bogs, swamps, marches, quicksand, and more.
When crossing a body of water with no bridge you need to use safe river fording techniques. They will give you the best chance of making it to the other side unharmed.
How to Choose Where to Cross a River
It is very important to find a safe crossing point before attempting to cross. When practical (and not dangerous), it is best to scout the river from an elevated perspective.
When choosing where to cross a river, unless you can jump it, narrow is not best. Look for straight, wide, and shallow water. Current is faster at the bends and usually deeper in narrow channels. Lots of debris is also a sign of fast flow. Test the current by throwing a branch in and seeing how fast it goes.
Mild ripples are generally safe to cross. Whitecaps (small, surface breaking waves) will be slippery.
Also, check downstream 100 meters of where you plan to cross. Make sure there are not any hazards that you could get swept into.
Consider your entry and exit points. An easy exit point is especially important. You want something low and open so you don’t have to climb through or up anything.
You may be able to avoid getting wet if you find a fallen log that spans the width of the river. If you do find one, don’t try to walk over it. It is much safer to straddle it and scoot yourself across. You must be very sure it will hold your weight. When you are in a group, only cross one person at a time.

Crossing a log
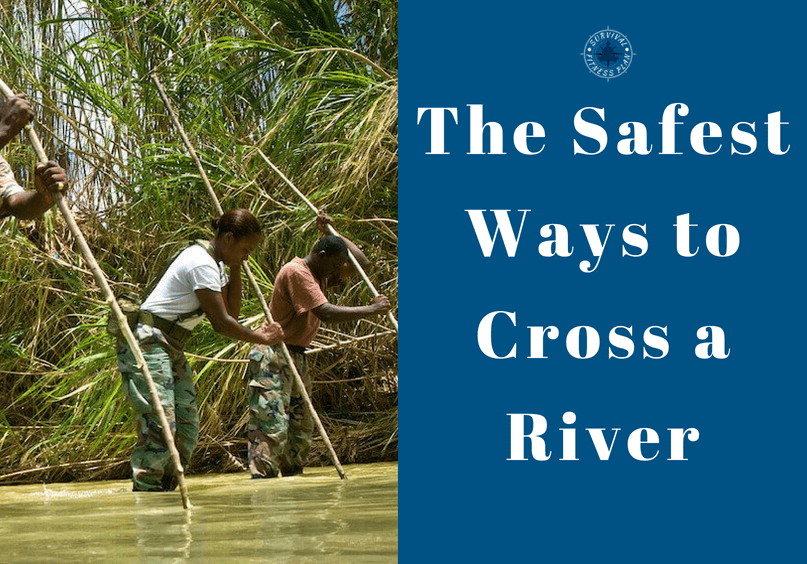
Ways to Wade Across a River
Wading is a method of walking through water. Use it solo or in a group to cross water no deeper than thigh height.
When learning how to wade across a river, take your pants, shirt, and socks off. This is to lessen the water's drag. Doing this also gives you dry clothes on the other side.
Keep your shoes on. You don’t want to risk damaging your feet and they will also give you more traction.
Tie your clothing to the top of your pack or in one bundle if you don’t have a pack. The idea is to keep everything together so it is easier to find if you have to discard them while crossing.
If wading across with a pack, waterproof the contents. Carry it well upon your shoulders. Leave your waist belt unclipped and loosen your shoulder straps so you can discard it if needed. You will not want to be struggling to get it off if the current sweeps you off your feet.
Don’t worry about having a heavy pack when crossing. It will keep you more stable.
Waterproofing a Backpack
Knowing how to waterproof a backpack will ensure you keep all your kit dry. Waterproofing your bag can also make an effective flotation device.
Double waterproof everything at the very least.
Line your pack with a large, tough, plastic bag. If you don’t want to buy a pack liner then you can use a dead-dog bag from the vet. Even a large, tough, plastic trash bag will work.
Group your things into separate, smaller dry-sacks before putting them in your pack. You could use plastic bags and/or zip-locks.
Seal all the bags watertight by following the manufacturer’s directions.
For a DIY waterproof bag, you can use generic plastic bags. The twist and fold method works well. Leave enough space at the top so you can put several twists in the bag. Fold the twisted part down over itself and secure it with some twine.

Waterproofing method
It may be faster to line your pack with two large bags, but it is not as good. This method for how to waterproof your backpack is more functional. It means you can access one group of things without having to expose everything else to the elements.
Solo Wading
When wading alone, use a strong branch to support you as you cross. Three legs are far more stable than two.
Position yourself upstream of your chosen exit point so that you can cross at a 45º angle to the current.
Face upstream and place the tip of your branch on the bottom of the river in front of you. Have it well slanted and let the current push it against your shoulder. Your branch breaks the current and provides stability. Shuffle sideways and a little downstream across the river. Use small, low, steps. Do not cross your feet.
Always maintain at least two points of contact with the bottom of the river. Don’t move too far on either side of your branch. You do not want to be leaning.
Only reposition the branch once your feet are very stable on the river floor. Shift it in small increments feeling for your next placement. Lift it off the river floor only as much as you need to.

Solo wading
Group Wading
Wading in a group is a good river crossing challenge for teambuilding.
When two or more people need to get across you can use group wading. The technique differs a little depending on how many people you have.
For two people wading, the stronger person is upstream, and he faces downstream. The second person faces the first person (looking upstream).
Grab each other by the shoulder straps of each other’s life jackets. If you don’t have lifejackets then grab t-shirts or upper arms.
One person stays stationary while the other moves. Use the same small sideways steps as explained. Next, the other moves and the first person stays still. Repeat this process.

Wading in a pair
For three to five people, huddle together and each person grabs the people on either side of him. One or more people stay stationary while the rest move. Due to the group formation, you may end up rotating the group around the stationary person/people. It is okay to do this.

Group wading
Wading in groups larger than five is not recommended as it becomes too hard to coordinate.
As with all group co-ordination activities, clear communication is very important. Agree on a plan of movement beforehand and appoint one person to direct it as you go.
Inline Crossing
Use inline crossing to move larger numbers of inexperienced people.
With this method, you use your bodies to redirect the current so people can move behind each-other.
The strongest person enters the water facing upstream. The second person moves behind the first. He takes up his position immediately to the side of the first person. They link arms.
Everyone else copies this action until they form one line across the water. More than one person can move at a time.

Enter the water facing upstream
Once the line is steady, the first person moves down it to take his new position at the end.

Get the line steady before moving
Everyone does this in the order that they entered. Continue to do this until the line reaches the other side and everyone is on shore.

Exit the water in the order your entered
The Best Way to Swim Across a River
Swimming across a river is the last resort move, but you may have to.
When swimming across a river you must allow for the drag of the current. Choose your exit point and then choose an entry point upstream. How far upstream you need to enter depends on the strength of the current and how strong of a swimmer you are. Use your best judgment.
Use the aggressive swimming technique (freestyle with your head above water).
When there is more than one swimmer it is a good idea to pair (or triple if there is an odd number) them up. Pair a good swimmer that knows proper rescue techniques with a weak one so he can help if needed.
Improvised Flotation Aids
Any medium-sized object that floats can aid you when swimming across a body of water. A football, styrofoam cooler, floating log, etc.
Lashing together smaller empty containers also works well in slow water.
Tie your flotation device to your wrist and grab onto it if you get tired. You could also hug it with one arm although you would need to improvise your stroke. Sidestroke would work well for this.
How to Make a Floating Backpack
Waterproofing your pack as described before will give it some buoyancy.
If you know you will need the pack as a floatation device, trap air inside the pack liner before sealing it off.
It is also a good idea to then put your whole bag in one more large waterproof bag. This gives an extra layer of waterproofing and means you can trap more air before entering the water. This outer layer will also prevent the actual pack from becoming waterlogged.
Tether your pack to your wrist using a quick release knot so it is easy to detach it if needed. Also, it is best if the tether is long.
You can hold onto your pack as you swim to use it for buoyancy. Another way is to push it in front of you while using the aggressive stroke.
If the pack gets waterlogged, let it go so you can swim and then pull it to shore by the tether.
River Crossing Rope Technique
Having a rope increases safety when crossing water and may also increase the speed. This information assumes you only have rope and no other specialist equipment.
You can adapt some of these as a teambuilding river crossing activity for use on dry land also.
Looped Rope River Crossing
This is one of the safest ways to cross a river when you have a rope but no other special equipment. You need at least three people and a rope three times the width of the river.
The first and last people to cross should be the strongest in the group, with the stronger of the two going first.
Tie the rope into a large loop and secure the person who is going to cross first (person A) to the loop. You can tie a loop in the rope and put it over his/her chest.
As person A crosses the other two people let the rope out as needed. They must do their best to keep the rope out of the water and be ready to haul person A back if needed.

Be ready to haul person A back if needed
Person A is the only one secured to the rope.
When person A reaches the other side he unties himself.
As many people as needed can now cross (B), one at a time, by securing themselves to the rope and crossing over.

Cross one at a time
Extra people can help while others are crossing, but person A takes most of the strain. This person should be as close as possible to the position across from the person crossing.

Person A takes most of the strain
Line River Crossing Technique
When you don’t have enough rope and/or people to do the looped rope crossing, you can use the line crossing.
Stretch the rope across the water and secure it on both ends. To do this you must get one end of the rope across the other side of the river.
If there is already someone on the other side you can throw it over. If not then you can attach one end of the rope to the strongest swimmer (or wader) in the group and have him take it over.
It is preferable not to attach the rope directly to the swimmer, e.g., attach it to the back of his life vest instead. That way it will be easier for the swimmer to discard the line if needed.
As person A crosses the other two people let the rope out as needed. They must do their best to keep the rope out of the water and be ready to haul person A back if needed.

It is better not to attach the rope directly to the swimmer
If you must attach the rope directly to the swimmer you can use a bowline.
One person should feed the line out as the swimmer crosses. When feeding the line out, let it drift in the current to reduce drag on the swimmer.
To secure the rope tie it to a sturdy tree, rock, or something similar. If nothing else is available you can use a human anchor. When doing so, is best to have at least one other person pushing down on him so he doesn’t get dragged into the water.
Once the rope is secure on both sides, people can start wading across. Wade across facing the current, using the rope for support. Apply tension to the line by leaning back a little. This will help keep you stable.
Do not cross your legs as you wade across and only move one foot at a time.

Cross with caution
To keep the rope, the last person must release the knot and then attach himself to it. The people on the other side can pull him across if needed.
The Best Rope Throwing Technique
Before you can do the line crossing you need to get one end of it secured to the other side of the water. Knowing the correct way of throwing rope will increase the distance you can throw it.
When throwing rope, in most cases you should aim to over-throw it.
If you intend to keep one end of the rope (which is usually the case) be sure to secure it to something.
Note: Even when throwing all the rope to someone it is a good idea to secure one end. If your throw does not make it over the obstacle you can pull it back. If it does make it then un-secure your end and your friend can pull it over.
Tie a weight or a bulky stopper knot to the end you are going to throw over. Coil half the rope on the palm of your right hand and the rest of it on your fingers.
Stand on one end to secure it, or tie it to something.
Grab the coils you made on your fingers with your left hand. As you throw, release the right-hand coil a split second before the left.

Release the right-hand coil a split second before the left
When throwing a weighted rope over a branch beware of it swinging back.
Improvised Raft Building
If the water body you want to cross is too wide, deep, cold, and/or contains dangerous animals, it is a good idea to build a raft. It also helps for keeping you and your gear dry. Raft building is also a great river crossing game for teambuilding.
Building a raft can be very helpful, but if you do it wrong the results can be disastrous.
Build the raft near to the water in which you want to launch it.
Improvised rafts are not suitable for the ocean. It is unlikely that they will stand up to the force of an angry sea.
There are many ways to build a raft. You can use bamboo, un-rotted wood, or other floating objects.
Always test your raft before committing to using it.
How to Make a Brush Raft
If you have a couple of ponchos in your group you can construct a brush raft. When done right it can float over 100 kilograms, which is good for one average sized person and his kit.
A tarpaulin (groundsheet) or something similar also works. As long as it is impermeable (waterproof) and about the same size as a poncho.
Spread one poncho on the ground with the inner side facing the sky. Tie a length of cord (vines work) at each corner and also one in the center of each side. Each line must be long enough to reach the opposite diagonal or side. If there isn’t dedicated tie points (grommets) then you can bunch up the material in a package around a small rock. Tie a clove hitch below the rock. The rock prevents the knot from slipping off.
Pile fresh, green brush on top of the poncho about half a meter high. It must be all brush, no thick branches or anything that could pierce the ponchos.
Next, find two small saplings and construct an x-frame. Place this x-frame on top of the brush.
Pile another 50 cm of brush on top of that. Push down on it all to compress it a little.
Pull the sides of the poncho up and around the brush and then tie all the lines together with their opposites. Tie them very secure.

Tie the brush raft together securely
Spread the second poncho on the ground next to your brush package, the inner side facing the sky. Tie cord at the corners and the sides in the same way as the first time. Place your brush package onto the second poncho with the tied side facing down.
Secure it in the same manner. When you place the brush raft in the water, do it with the tied side of the second poncho facing up.

Place the brush raft in the water with the tied side of the second poncho facing up
How to Make a Pressure Raft
A pressure raft takes a lot more effort to build than the brush raft. The tradeoff is that it is much sturdier and can support much more weight.
It is best to use dry, dead, standing trees for logs. Also, not all wood floats. Test the species you intend to use before constructing the raft.
Collect logs of approximately the same diameter and make them the same length. These are your base logs.
How many base logs you collect depends on how wide you want the raft.
Also, gather four logs of thinner diameter. Have them about one meter longer than the thickness of the raft. These are your pressure logs.
Lay two pressure logs on the ground at a distance apart about one meter less than the length of the base logs.
Lay the base logs on top of the pressure logs so that they are perpendicular to them. The ends should have enough overhang so they cannot slip off.
Place the other two pressure bars on top of the thicker ones. Make them in alignment and parallel with the pressure bars on the bottom.
Lash the ends of the top and bottom pressure bars together at all corners so they “clamp” the raft together. Do it as tight as you can.

Pressure raft
How to Build a Bamboo Raft
Bamboo is one of the best materials for raft building. It is strong, flexible, and floats well. Here are instructions on how to make a bamboo raft.
Note: Bamboo that has not dried out can sink so is not good for bamboo raft construction. It can take a while for it to dry out if it is fresh cut.
Cut thick-ish bamboo in three-meter lengths. If it is too hard to cut down then you can burn it at its base until it falls. Make a hole in the lower sections before burning it to prevent it from exploding.
Make holes in each of the lengths about 30cm from the ends and also in the center. Make sure the holes will be in alignment when you put the lengths side by side.
Place the bamboo side by side until you get your desired width. Pass a sapling through all the holes.
Create a second row, in the same manner, using one less length of bamboo. Place this second row on top of the first with the lengths of the top row sitting in the valleys of the first.
Lash the lengths of bamboo together, top and bottom and side by side. Also lash the saplings together.

Bamboo raft
You can do this with materials other than bamboo also, but bamboo works best.
River Rafting Tips
Follow these tips for rafting to have as safe and dry journey as possible.
- Always test your raft before committing to taking it across a water body.
- Keep near the shore if possible and head to the bank if the raft gets out of control.
- If rafting between islands, do it so the ebb takes you out and the high tide takes you to the new island. Study the currents by floating something you can observe.
- If there are several rafts put one out in front as a scout. It should have the most capable members of the group and carry minimal equipment.
- Use a pole to move the raft through shallow water. Use an oar through deep water.
- Stay near the inside edge of river bends. The current will be slower.
- Tie all equipment to the raft and make sure nothing trails over the edges.
- Tie everyone to the raft (use a bowline around the waist), except in swift water. Lifelines should allow free movement but should not trail in the water.
- Avoid obstructions.
When you come across rapids (or other dangerous ground) do the following:
- Unload the raft and secure it to the bank.
- Carry all equipment downstream by land.
- If the raft is too heavy to carry past the obstacle then place at least one member downstream of the raft.
- He/they should be at a safe spot where they will be able to recover it.
- Release the raft.
- Be sure to make repairs if needed.
At night secure the raft well and take shelter on high ground away from the river.
How to Escape Quicksand, Bogs, Swamps, etc.
Besides rivers, lakes, and the ocean, there are other types of water bodies that you may come across. These include bogs, swamps, quicksand, quagmires, and more.
Do not try to walk across them. Lifting your feet while standing will make you sink further.
Go around them or build an improvised bridge using logs, branches, or whatever is around. If this is not viable, there are other specific methods you can use.
How to Cross Swamps and Bogs
You can cross a bog or swamp by lying face down with your arms and legs spread. Use a flotation device and slowly swim/pull yourself along. Keep your body horizontal.
Surviving Quicksand
Quicksand is a mixture of sand and water that sucks down objects that put weight on its surface. It usually occurs on flat shores, in silt-choked rivers with shifting watercourses, and near the mouths of large rivers. You can test for quicksand by throwing a small stone into the suspected area. It will sink in quicksand.
Although it has more suction, it is possible to cross quicksand in the same manner as bogs and swamps.
When walking in quicksand country carry a pole as it will help you get out.
How to Escape from Quicksand if you Fall In
When escaping quicksand you must remain calm and use slow movements.
Lay the pole on the surface of the quicksand. Use it to guide you onto your back in a floating position, with your arms and legs spread out.
Shift the pole under your hips at right angles to your spine.

Remain calm and use slow movements
Pull out your legs, one after the other, and move to the nearest solid ground.
How to Swim Through Dense Vegetation
When swimming in dense vegetation stay near the surface. Thrashing about will get you in trouble. Use a gentle breaststroke and peel away the vegetation around you as you pass through.
How to Cross a Mangrove Swamp
Mangrove swamps are usually found along tropical coastlines. They are best crossed during low tide.
If you are inland trying to get to the ocean you can work your way through a narrow grove of trees.
When you are trying to get inland you are better off going to the small watercourses (streams or channels).
Always be on the lookout for crocodiles. If you see one, leave the water and get over the mangrove roots.
If the amount of water in the swamp allows it, build a raft.
How to Move Through Back Bays
Back bays are muddy islands found behind the dunes near the ocean. They are very tiring to cross. If you must, it is better to find the deep water sections so you can swim as opposed to trekking through the soft mud. Failing that, look for firmer bottom terrain such as sand, shell or stone. Trying to cross the muddy islands is a bad idea as they are usually too soft.
Safe River Crossing Techniques Conclusion
In this post, you have learned how to cross a river safely using a variety of methods. Remember to choose where to cross the river carefully. This will depend on which of the ways to cross a river you decide to use. In shallow water, use one of the ways to wade a river. Don't forget about waterproofing your backpack.
In deeper water, use the safest way to swim across a river as described. Use a flotation aid for kids and weak swimmers. In fact, I recommend a floatation aid for everyone. Using rope is a safe river crossing method in comparison to swimming. Learn how to throw a rope properly and always secure one end first.
For very deep or wide rivers, consider making a bamboo raft. Pressure and brush rafts are also good options. The type of raft you choose to construct will depend on what raft building resources you have. Follow the water rafting tips to stay as safe and dry as possible.
Finally, you now know how to survive quicksand and other water-based terrains.
Did you find this article about how to ford across a river useful? If so, please share it with your friends.

Driven by a passion for fitness and a commitment to helping men worldwide stay fit and capable, Sam formulated a plan that will get anyone to out-run, out-fight, and out-live the majority of the world's population.
As an avid traveler, he sought a solution that didn't require expensive gym memberships or exclusive clubs — that any man, anywhere, could take and improve his fitness straight away.
Now, after nearly two decades of relentless training, refining, simplifying, and perfecting the Survival Fitness Plan, Sam is eager to share this transformative program with the world.


The information on this website is made public for reference only.
Only you are responsible for how you choose to use the information or the result of your actions.
Consult a physician before undertaking any new form of physical activity.
© Survival Fitness Plan